How Can We Help?
Installing on ProxMox
Installation on ProxMox is simple but requires a couple of extra steps.
We will use the VMWare OVA version of installation. This is a multi-step process and requires knowledge of shell commands in ProxMox. However, we have made the instructions as easy as possible to follow. We are going to assume that you are conversant with ProxMox and so will not go into ProxMox features in depth.
Uploading the OVA to ProxMox
Since we are using an OVA version, we will first need to upload the OVA to ProxMox.
- Log into the ProxMox console
- Create a folder called OVA_Import.
- You will now need to use an SFTP client such as WinSCP (Windows) or CyberDuck (Mac) to transfer the OVA file.
- Once the file is transferred, you will see it in the folder you created.
- Type the following command to extract the contents of the OVA file.
- Tar xvf {filename}. See thee example below.
tar xvf Edgenexus-ADC-6.8-64-OVA.1155-1961-9704-bam2221.ovaOnce extracted, you should see something like the below example
root@proxmox:~/OVA_Import# ls
Edgenexus-ADC-6.8-64-OVA.1155-1961-9704-bam2221.ova
root@proxmox:~/OVA_Import# tar xvf Edgenexus-ADC-6.8-64-OVA.1155-1961-9704-bam2221.ova
Edgenexus-ADC-6.8-64-OVA.1155-1961-9704-bam2221.ovf
Edgenexus-ADC-6.8-64-OVA.1155-1961-9704-bam2221.mf
Edgenexus-ADC-6.8-64-OVA.1155-1961-9704-bam2221-disk1.vmdk
root@proxmox:~/OVA_Import#- There are three files. The .ovf and .mf are the configuration. The .vmdk is the virtual disk holding the ADC.
- The next step is to import the VMDK into ProxMox and create the virtual machine.
- Type the following command to create the virtual machine using the configuration files.
qm importovf 137 ./{filename.ovf} local-lvm --format qcow2- In this example, we have given an ID of 100, but this may be different for your installation if you already have virtual machines created in ProxMox. You can determine the next ID by starting the process of VM creation in ProxMox, or by choosing a number higher than 100 that is safely out of reach.
- The VM has now been created.
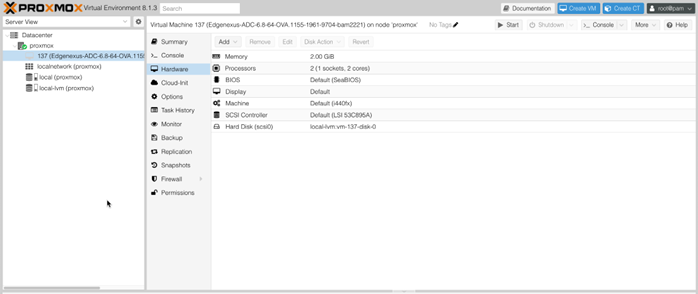
- The next step is to add a network interface to the VM.
- Click on Hardware on the right panel.
- Click Add and choose a Network Interface.
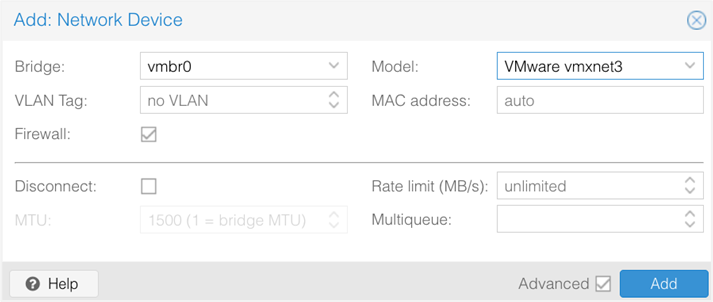
- Configure it as the image above shows. It’s important to choose the Model as VMware vmxnet3.
- Click Add once configured.
- You can additional network adapters as your needs dictate.
- You can now start the VM and proceed to use the instructions in the First Boot Configuration chapter.