How Can We Help?
Upgrading an ADC Cluster in situ
This article deals with the process of upgrading a cluster of ADC’s from one version to another in a safe and sustainable manner.
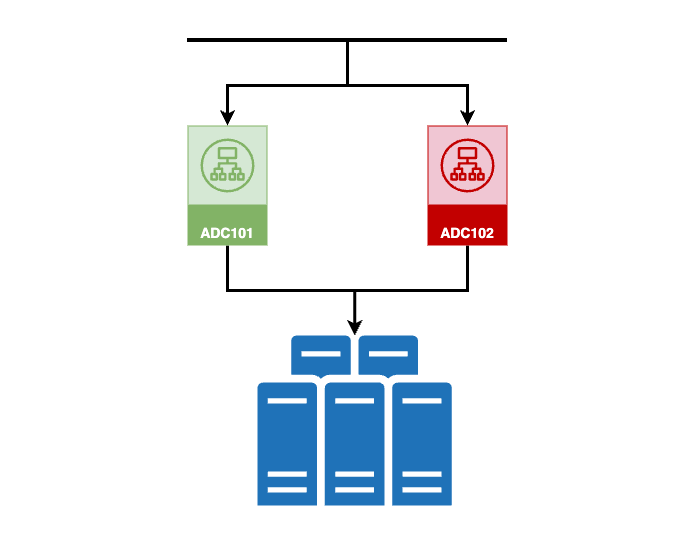
We have two ADCs in our network, ADC101 and ADC102. These are in an Active-Passive cluster, with ADC101 being the current Active, and ADC102 being the current Passive.
For example, we wish to upgrade them from version 5.00 to version 5.01.
The advised process is as follows:
- Log into each ADC and navigate to Advanced > Configuration
- Download the configuration files of both ADCs
- You will perform the upgrade on the Secondary first
- Open the web console of the Secondary ADC
- Navigate to Advanced > Software > Download from Cloud
- You should see the build within the list
- Click on it, and then click the Download Selected Software button.
The build will download to the Apply Software section on the same page. - If the update is not present in the list, please locate the file you would have been provided or downloaded via our website.
You will need the Machine ID and License ID of each ADC to do this.
Go to https://appstore.edgenexus.io/software-update/ to perform a manual download.
Once downloaded, navigate to the Upload Software section in Advanced > Software.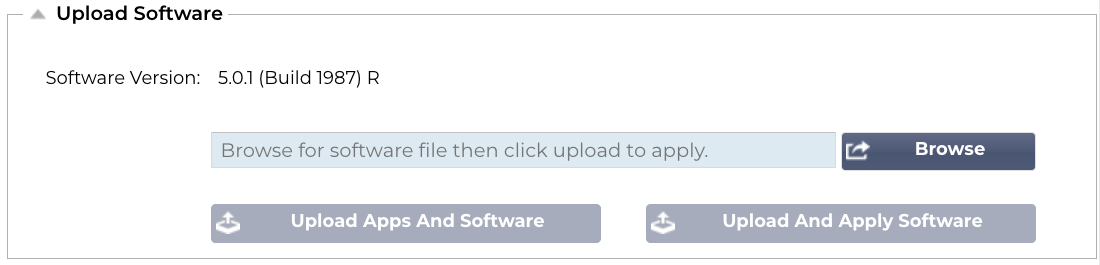
Browse to the downloaded file, and click on Upload Apps and Software. The update is encrypted to the ADC’s Machine ID and License ID, and hence unique to the ADC.
The update will now be made available in the Apply Software section. - Now that you have the update file in place, click on it and choose Apply Selected Software.

- The build will now be installed, after which the ADC will restart.
- Leave the ADCs to work for about hours to stablilise and replicate all the configuration from the Primary to the Secondary.
Now, we have to upgrade the Primary. In order to do this safely, and minimize downtime impact, please follow the steps below.
- Now that synchronization and stabilization has completed, move the Secondary to become the Primary.
- Leave it like this until you and your users are satisfied that all the services are operational to your level of satisfaction.
- Once you are satisfied, you can upgrade the Secondary (previously Primary) using the same method as above.
- You should now leave the newly upgraded secondary to settle and stabilize.
- Once done, you could move it back to the Primary position, or leave it as is.
What if I am not happy and wish to revert?
If you wish to revert the Primary (new) to the older version, its simple to do.
- Switch the Primary to become the Secondary.
- Navigate to Advanced > Software > Apply Software
- Choose the previously installed build.
- Click Apply Selected Software Update.
- The build will revert to the previous version and you’re good to go.
Important
We ask you to update the build and let it settle for stabilizaiton and then to determine user satisfaction.