How Can We Help?
Migrating EdgeADC v4 to EdgeADC v5R
A migration of an Edgenexus EdgeADC appliance from variant C to variant R is fairly straightforward when it comes to virtual installations. For hardware installations, please take a look further down in this KB article.
To migrate the ADC, you must first download the VM installation file from https://www.edgenexus.io. Do this by filling out the trial form at https://edgenexus.io/try and downloading the version you need for your virtualization environment.
Migrating a Clustered ADC environment
Note: Migrating will incur an element of downtime and is best done when there are no users
The cluster method is by far the easiest, but still requires a level of caution when performing the migration. Follow the steps below.
Stage 1 – Migrating the Original Secondary
- The first thing to do is set up TWO new VMs to become your new ADCs.
- We will start by migrating the Secondary first.
- Now, make a note of your current Secondary ADC’s IP address and the name of the ADC (found in Networking).
- Locate the original license key provided to you for this ADC. The license key is provided against the Machine ID.
- Now that you have these items, power down the secondary ADC.
- Choose one of the VMs that you created to be your new Secondary ADC.
- Configure its IP address to match the old Secondary. You can do this using the console and the command SET GREENSIDE={IP-ADDRESS}
- Log into the ADC using your browser.
- Import the license into the ADC
- Change the NAME to match your original Secondary.
- Log onto your Primary ADC.
- You will now see the new Secondary in the Unclaimed Devices section.
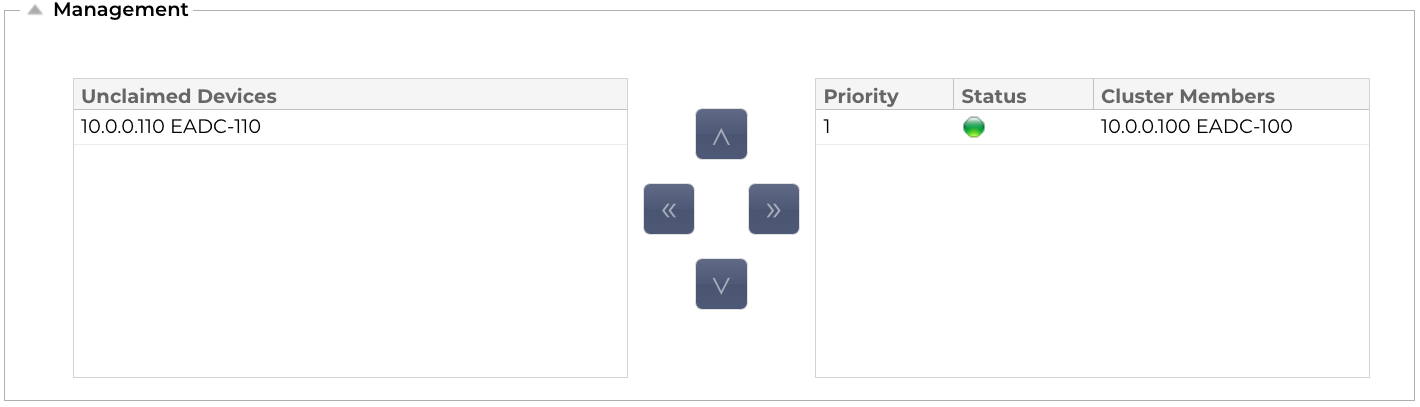
- Move it to the right side section to cluster the ADCs.
- You should now have the configuration of the Primary replicated to the new Secondary.
- Our advice is to run this setup for 24-48 hours to ensure the new Secondary is stable in your environment.
- Thoroughly test all the Virtual Services to ensure proper performance.
Stage Two – Migrating the Original Primary
- Now, we will migrate the original Primary to the new version.
- At this point, you need to understand that some users may get disconnected from their sessions.
- Move the order of the ADCs in the Clustering right side, so the new Secondary is on top of the original Primary.
- The ADCs should now flip, and the original Primary will be now be the Secondary.
- Make a note of the IP Address, Name and have the original license file ready.
- Log into the Secondary (original Primary) and backup the configuration from Advanced > Configuration.
- Shut down the ADC after performing the backup.
- Choose the remaining VM that you created.
- Configure its IP address to match the original Primary. You can do this using the console and the command SET GREENSIDE={IP-ADDRESS}.
- Log into the ADC using your browser.
- Import the license into the ADC.
- Change the NAME to match your original Primary.
- Log onto your new Primary ADC.
- You will now see the new Secondary in the Unclaimed Devices section.
- Move it to the right side section to cluster the ADCs.
- You should now have the configuration of the Primary replicated to the new Secondary.
- At this point you can continue to use this as your new Secondary, or wait for the advisory period and then flip the ADCs.
Migrating a single ADC environment – Non-Cluster method
Note: Migrating a single ADC will incur an element of downtime.
- Log into the ADC as an admin user
- Navigate to Advanced > Configuration
- Download the configuration file
- Proceed to Library > SSL Certificates
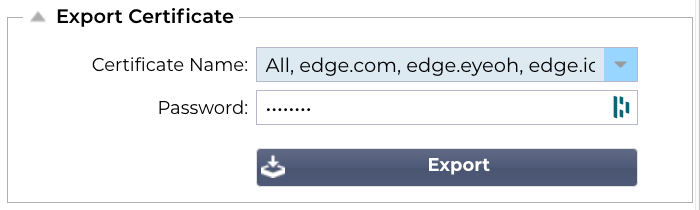
- Export the SSL certificates – select ALL and provide a password.
- The certificates will be exported as a JNBK encrypted file.
- Import the OVA or other format into your VM infrastructure
- Change the CPU, memory and any other custom parameters so they match the existing v4 ADC VM
- Start the new v5 VM
- Now, it is time to bring down the existing v4 ADC VM. Just power it off, but please do not delete it.
- Let’s move onto the new v5 ADC where we will finish the work.
- Import the configuration file into the new v5 ADC VM.
- Once done, power cycle the new ADC v5 VM.
- Proceed to Library SSL Certificates
- Choose Restore SSL Certificates
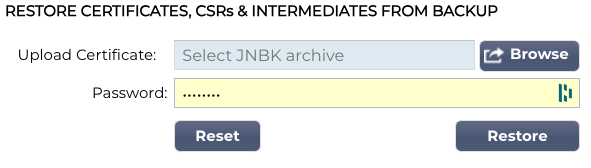
- Browse to the JNBK file and provide the password
- Click Restore
- The new v5 ADC should now be available using the original IP address and all its configuration intact.